Showing posts with label Monkey Sew Monkey Do. Show all posts

February 26, 2011

Muted Nostalgia

I'm linking again even though I wrote this post a few days ago...

WIP Wednesday at Freshly Pieced

Last night Evan's science fair project was selected as one of the top projects in Jordan School District. He's kind of cracking me up about the whole thing. He's played it really cool, but I found out he slept with his blue ribbon last night. Sorry boy - it was something that had to be shared...

He really is excited, but he's driving me crazy! Everytime he's been asked to do something this morning, he has replied,
But I won the science fair!
Like that's reason to be king for a day or something. I had to escape his highness so I retreated to my sewing room. I have a few UFO's and felt the need to wrap something up. Success!

I quilted and bound a small topper (calling it Muted Nostalgia). I also 3/4 completed quilting a twin topper, but I ran out of thread and must stop by the LQS or fabric store when I venture out today.


And here she is in her new abode:


I love this little guy. I found him on Etsy. He's a little felted gnome. He fits right in to this incomplete cloche scene. It's missing something, but I just can't figure out what else to add. Suggestions?

February 20, 2011

Back in the swing

I finally got my sewing machine moved out of the family room and up to my office. I spent Friday in a conundrum over how my once open space is now wall to wall STUFF. I still need to move the futon out, and that will help immensely, but without a clear plan of what to do with that dang thing, it won't get moved anywhere.

Yesterday I decided that I just didn't care what the state of the rest of the room was - I wanted to sew. Took me most of the day (and I "missed" going to see Tron 3D at the $1 movie with Jon and the boys), but this is what happened...


Of course the photo just doesn't capture the color. It's got a lot more yellow than what I see here.

Nope not much better.

Anyway - I need to add some blocks to the sides, but I used up all of the sashing so I'll have to venture out and hopefully get more of it.  Let me just tell you that putting this together without a pattern was a bit frustrating. I don't know how much fabric I wasted tyring to get it the way I wanted, but I'm thrilled with the way she turned out.

It was a very blaw weather day yesterday, and this was the perfect project to chase the bleeriness away.

She's hanging on the door right now, and I've discovered that my new room arrangement has a perfect spot for a flannel design wall - right above my machine... I know what I'll be googling this morning.

WIP Wednesday at Freshly Pieced

January 17, 2011

Giving Cozy

I'm finally getting around to posting photos of one of the quilts I made for Christmas this year. You know the one I talked about here? Here it is...


You tell me - does it looked like stacked books? It screams it at me, but that may because of me being a bibliophile. Jon said it's a little abstract.

I gave my stepdad this quilt because I have been known to give him books for Christmas. I give him books because I enjoy the conversations where he calls me out of the blue and we talk about the book I've given. I'm hoping that he pulls this one over him while he's reading and still calls me.
The background fabric is Kona Mustard. I wasn't sold on it when it was one solid piece of baby poop, but it's become a favorite color after seeing it with these other fabrics - which I pulled out of the remnant bin by choosing the ones that seemed masculine.


The top is pieced with strips created by cutting my remnant to the desired thickness (I used some 1 1/2" strips and went up to 4") and then cut them in half (resulting in two 22"ish pieces). Then I cut a 22" piece of the background fabric into whatever thickness I needed and sewed each side of the background strip to each side of the book. This created a loop. Then I randomly cut the background fabric, which varies the amount of background on each side of each book. The trick was getting them arranged so that they didn't look like they'd fall over - see that one 7 up from the bottom? I think it needed to be pushed over more to support the books on top of it. Something about this just tells me they're going to topple...
I pieced the back with a luscious gray flannel (which again screamed to me) and a column of squares from each of the book bindings. I quilted in the ditch around each book. I don't remember what I bound it with. 

I'm in serious love with this one - enough that I think I need to make me one. Silly that I didn't remember to take photos of the finished quilt, but I got so excited about giving it that I just rushed right through to wrapping. It makes me want to curl up with a book or one of my guys and spend an afternoon inside.

Giving Cozy

I'm finally getting around to posting photos of one of the quilts I made for Christmas this year. You know the one I talked about here? Here it is...


You tell me - does it looked like stacked books? It screams it at me, but that may because of me being a bibliophile. Jon said it's a little abstract.

I gave my stepdad this quilt because I have been known to give him books for Christmas. I give him books because I enjoy the conversations where he calls me out of the blue and we talk about the book I've given. I'm hoping that he pulls this one over him while he's reading and still calls me.
The background fabric is Kona Mustard. I wasn't sold on it when it was one solid piece of baby poop, but it's become a favorite color after seeing it with these other fabrics - which I pulled out of the remnant bin by choosing the ones that seemed masculine.


The top is pieced with strips created by cutting my remnant to the desired thickness (I used some 1 1/2" strips and went up to 4") and then cut them in half (resulting in two 22"ish pieces). Then I cut a 22" piece of the background fabric into whatever thickness I needed and sewed each side of the background strip to each side of the book. This created a loop. Then I randomly cut the background fabric, which varies the amount of background on each side of each book. The trick was getting them arranged so that they didn't look like they'd fall over - see that one 7 up from the bottom? I think it needed to be pushed over more to support the books on top of it. Something about this just tells me they're going to topple...
I pieced the back with a luscious gray flannel (which again screamed to me) and a column of squares from each of the book bindings. I quilted in the ditch around each book. I don't remember what I bound it with. 

I'm in serious love with this one - enough that I think I need to make me one. Silly that I didn't remember to take photos of the finished quilt, but I got so excited about giving it that I just rushed right through to wrapping. It makes me want to curl up with a book or one of my guys and spend an afternoon inside.

January 11, 2011

Gathering Bling

This past Saturday I asked my SIL and niece if they'd like to sew while our hubbies and sons/nephews flew their helicopters and played Heroscape. She was way ahead of me and had been sewing with her friends the night before. So what's my stuff going to add to what she already had out.

I was assembling toppers, and she was working on pillows. She completely made me want to tackle that project - haven't done a pillow since this one...

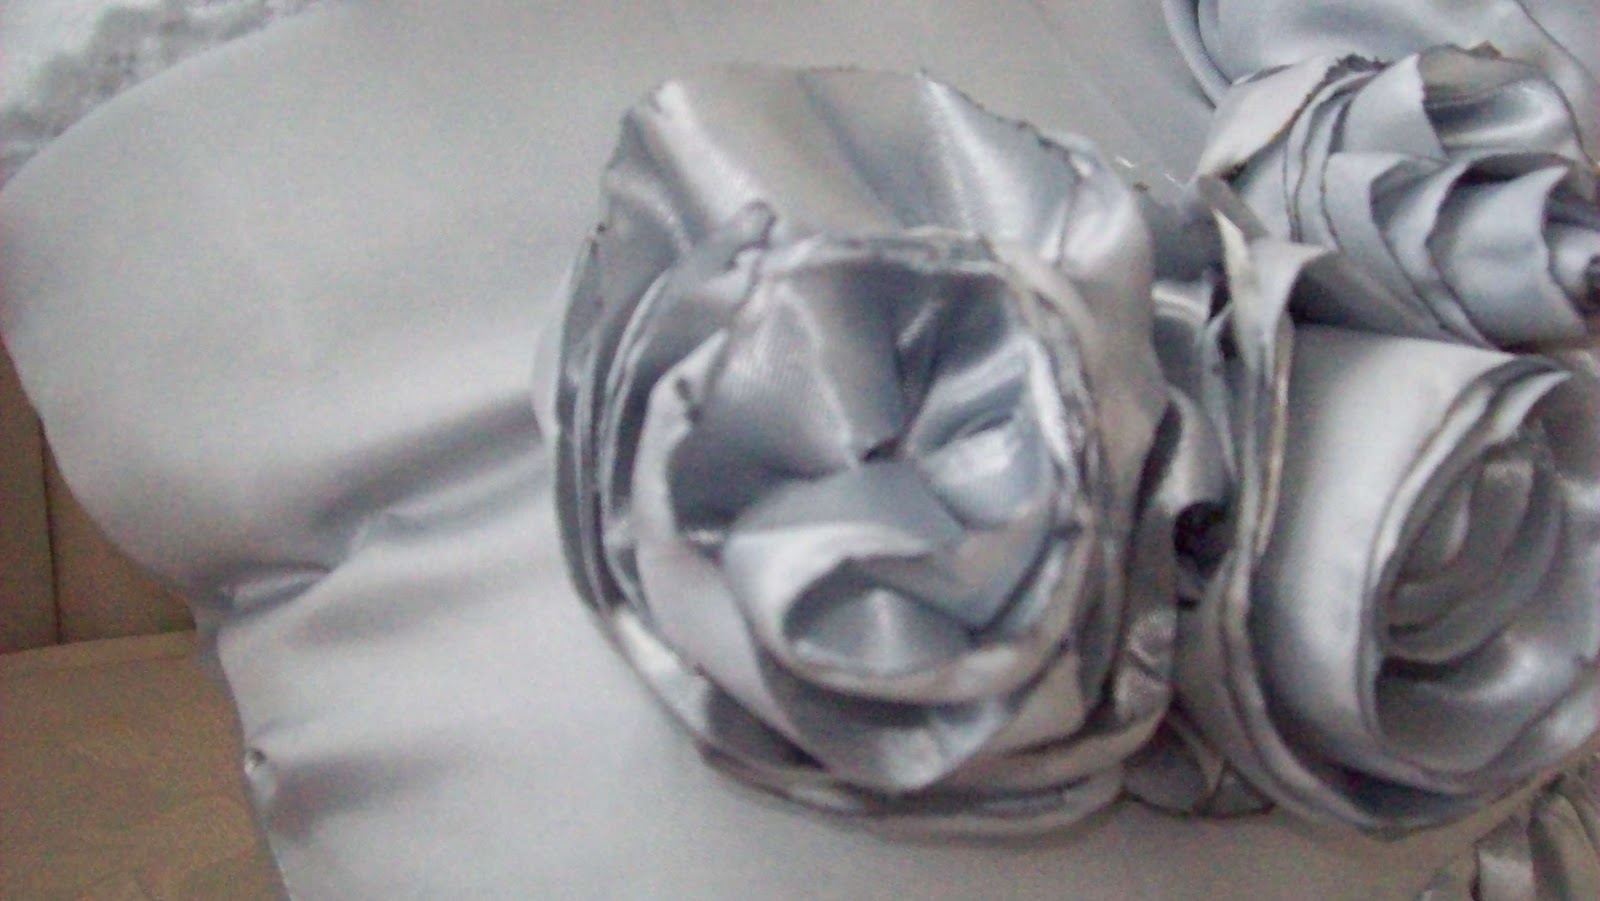
So Sunday I went through my stash and found some lovely silver satin that we used when Carson was this for Halloween...


Do you know how difficult satin is to work with? It does not stay in one place. It moooooooooves. I cut mutiple strips in 1 1/2 to 3" widths - kind of. Honestly they were mostly straight. Then I got out my ruffler foot (did you remember to use your jazz hands?), and ran the strips through the ruffler. Then I rolled the ruffled strips just like I was told to over here and made 5 of these. (ignore that they're already attached in this photo - I took these when it was all finished - brain wasn't thinking photo in the middle of this project...).

Now this is where the 2nd diva fit of the afternoon/evening came in. (Tell me you can gather satin with a ruffler foot without throwing the first one) I drive 3 middle school boys in our carpool a few times each week, and they are notorious for finding whatever crap has been stuffed under seats or shoved in pockets or thrown in the back. Seriously. One of the favorite car toys is one of those butane lighter things that make fire starting fairly safe (or encourage it in strange places - so go figure). I don't know why it's in my vehicle in the middle of winter, but I suspect it's a leftover from a scout trip. Anyway - I've seen a lot of blogs that say you should burn the edge of these flowers and that the fabric will curl nicely. SO - I wanted that lighter. Well guess what... It's not a problem locating it on any random Thursday, but when I actually need the thing it's no where to be found. Unless you look in the cupboard where all of my candles are stored... And if I decided to just grab it and sit down without letting my guys know I'd found what I was demanding, so be it... Anyway. Satin burns/melts very easily, and it's a bad thing for a mother of 3 boys to discover this and think it's cool enough that she cuts another strip of fabric and gets caught singe-ing right at the kitchen table. All I'm going to say is that it's a good thing there wasn't any fuel left in that lighter by the time I was finished...

Anyway. I was going to stop with the flowers, but the remaining fabric was calling to me. I needed to make a pillow while my ruffler was still attached to my sewing machine. So - I ended up with this: 

I think it's BE. YOU. TEE. FULL. Doesn't go so well with my white couch & chairs, but there's always a remedy for that isn't there?

I'd started out with 3 flowers and added the other 2 a little while later. When I had it how I wanted, I showed Jon, and do you know what his response was?!
Do you know how many times you swore while making that?
So not what I wanted to hear, but he was correct. There, I said it.

HE WAS RIGHT!!!

In my defense, allow me to say that you should NEVER under these circumstances attempt to make such a thing of purfled beauty. Yes that is a word, and when I'm asked for a word to describe me to a "T", that's the one I pull out - PURFLE. Look it up... What did my guys expect when I'd just switched my happy pill med two days before because my insurance company more than tripled the cost of my old medication? Were these guys supposed to know that I would be experiencing some withdrawal symptoms (headaches, nausea, dizziness, shaking, etc) from the old pills and that it may take some days before I find the new "normal" me? Was Jon really the wisest man when he said - and yes I'm going verbatim again folks,
Don't you think you should just man up and think about how you're acting. You're bigger than this.
Um. Really? You have no idea how upset that comment still makes me, and it's 48 hours later... Oh boy. But I really do love that pillow.

Linking to

Blogger's Pillow Party

November 01, 2010

9 Degree Tree Skirt

Seriously - WHAT AM I THINKING?! Smack in the middle of That Girl's Quilt Along I've suddenly got it in my brain that this is the year to make my own tree skirt. I have to say that I think I'm crazy, but I think this is going to be fabulous! 

It's got a little more white than I imagined, and there sure isn't very much green...

I've got it sandwiched and pinned and ready to quilt. I'm thinking a stipple pattern. Maybe a meandering loop.

Oh the possibilities!

November 3
Hah! I finished it last night - except I forgot to stitch on ties. I'll post a photo of the finished project as soon as I locate that sneaky battery charger and the camera batteries are working again.

Decided to enter it in the Blogger's Quilt Festival. If you're stopping by from the festival - Hello!

So - here's what I learned while doing this tree skirt:
  • I could have and should have done this much sooner than I did
  • When you have the tools, it's much easier (holy 9 degree ruler! what have I done without you?!)
  • Even my boys are interested in what I'm doing when they hear "CHRISTMAS!"
  • I really had to pay attention to catch all of those corners
  • I need to remind myself that busy patterns don't always work well in small doses
The story of this quilted tree skirt is:

Last year I was making that pizza table topper for my MIL for Christmas (still one of my favorites - ever!), and I decided that there had to be an easier way to make a round table topper. I googled and googled and found Jen. By blog stalking I found out the name of the town where Jen lives. It's a town of about 35-40,000 people. Not small but not huge.

I also enjoy doing family history research, and a few months ago I stumbled across a line of ancestors whose names had been submitted by a woman who lives in the same town as Jen. How funny is that? Reinforces what a small world we live in and that when we're all nice to each other it's a much more enjoyable place to be.

Anyway - Jen was my inspiration, and now that I've finished one tree skirt, I'm thinking I'd like to do a quilt made from some of her quilts on barns series.

October 28, 2010

That Girl's Quilt Along

Because I just don't have enough to fill my day, I've decided to join a Quilt Along. The directions were to use one charm pack (Martinique), one coordinating solid, and one neutral solid. So - this is what I went with:
That Girl---That Quilt - Quilt Along Week 1

February 14, 2010

Mon ami aime le rose

or RETURN OF THE STIPPLE MONSTER


I made my friend, April, and myself table runners for Valentine's Day. I named these runners "My Friend Loves Pink" - hence the title for this post.

They are just a little bit different (different sashing on the two sets of 4 hearts and I forgot to add the ribbon to the center square on hers), but I think she got the point that I was thinking about her...


I do realize that the plant on my table is a Christmas remnant, but it's still thriving, and it's red. So it works - OK?

 I had some left over charm squares, so I practiced meandering loop, grid, and squiggle grid machine stitches - because every machine quilter will tell you that it all takes practice. I doubled up the grid and squiggle grid squares to make a hot pad, and the other one I used to create "A Little Bit O Love". I'm currently using this in my living room. I'm going to have to make another one soon since the season has changed...


I don't think April knew what she was unleashing. I've got a small stockpile of table toppers building up, and I don't quite know what I'm going to do with them.

Oh - and if you're wondering who those handsome silohouettes (sp?) belong to, those would be my 3 offspring. That was last year's Mother's Day gift for my mom and myself (made by me).

Dang - where am I finding all of the time?

February 08, 2010

The Stipple Monster Pt 1

Just before Christmas I used my FaceBook status to ask what gift you were most excited to give. I had 3 that were at the top of my list. One was an album for my brother. The other two were for my mom and my mother-in-law.

I got to spend a wonderful weekend with my friend, April, in November. She taught me how to machine quilt while I was there.

My mom's table topper and placemats
I cut 1 5" charm pack (42 5" squares) in half and the stitched them together in a sort of stair stepped fashion.

This first photo is a closeup of the loopy meandering stitch I used for quilting.
Here's the back.


And most of the front. I have no idea why I couldn't get the left side when there's so much extra space on the right....

I didn't quilt the  placemats - I just stitched the half squares (aka rectangles) into a strip, and used duck cloth to complete the top. I used fleece instead of batting (figured it might wash better).


My Mother-In-Law's Table Topper
You don't have to be associated with the Hill family very long before you figure out that pizza is a fairly common component of family get-togethers. My in-laws have a large (probably 6 ft) round table with a 3 ft lazy susan in the middle. After Jon saw what I'd made for my mom, he complimented my work by telling me that I should make something like it for his mom. Well - my noggin went to work, and I came up with the perfect table topper...

Griff and I found two "cheese" fabrics, a pepperoni, an olive or sausage, and a striped one that's supposed to be green peppers. I pieced split rail or basket weave blocks using two strips of cheese and one strip of toppings. Then I cut that into a circle. I thought I could just sew a sauce binding around the edge, but the circle was too small, so that first sauce strip was unpicked, lengthened, gathered (wish I'd discovered my ruffler foot then...), and stitched to the pieced quilt. Next I flipped the sauce strip out and top stitched to keep it in place.

Stacked the quilt (with a brown crust), meander loop stitched it, and bound it with golden rod blanket binding.


Tada!

My favorite part of this was how we gave it to her. We picked up a large, empty, pizza box from a local pizzeria, folded the table topper up like a slice of pizza (couldn't locate a box large enough for a 30" pie), and gave her the box. She didn't quite know what to think about that, but once it was open I think she loved it!

February 06, 2010

Fighting the Frumps

Remember yesterday morning's dilemma? Well, I did end up making myself a pillow...


Cut 17" muslin circle, marked a spiral in with 1" spacing, and cut 1 yard of plaid into 2 1/2" strips.


Sewed all strips together and used my rolled hem presser foot (this is another new discovery) to hem one side of the plaid strips.


Used my ruffler (imagine me saying this with pretty-close-to-jazz-hands) to sew the strips onto the spiral marked on the muslin.  This was not an easy task... Now - take a moment to really look at this ruffler foot. It's a little intimidating. It has moving parts. You can choose whether to gather every stitch, every 6, or every 12. You can also choose how full you want the gathers to be. For this project I gathered every stitch with a medium fullness.


I topstitched the plaid about 1/8" away from the seam so that I could control the direction of the ruffles. I forgot to take a picture of that part.

I cut two half+ circles (the "+" being ~1inch that I hemmed on each straight edge) and stacked the straight edges. Sewed the stacked half circles to the ruffled front, and created an envelope for a 16" round pillow form.

Here is the finished product! Can you stand it?! I think it turned out SO ADORABLE!!!


Couple of things I would do differently to avoid the white spots:

  1. Cut to-be-ruffled fabric into 3 1/2" strips.

  2. Use a base fabric that coordinates or matches the ruffled fabric.

  3. Use a spiral that's a little bit closer together than 1".

  4. First row of spiral would be on the edge of the base fabric. I started 1" in.
Not too bad for a Saturday morning, huh?
Related Posts Plugin for WordPress, Blogger...